Introduction
Within the developer community practice at Opencast software, once a month we are given a problem to solve. We call this the Learn by Doing initiative. These problems can range in difficulty, however, the premise is always the same: try and solve the problem in a language you’re not comfortable with or wish to learn more about. The idea behind this initiative is that it’s a great way to learn a new technology by just tackling a problem head on.
For July’s Learn by Doing problem, we were tasked with creating a REST API which returns river and rainfall levels. In this post, I’ll explore why I went with a Firebeetle 2 ESP32-E, how did I implement this solution using C++, and what I learnt from it.
Within this read, I’ll cover implementing the Flood API, the tools I used to implement it, and some of the challenges I faced along the way.
The problem
As previously mentioned, the problem revolved around creating a REST API. To implement this, I was provided an OpenAPI 3.1 contract to follow. As for data for this API, I was also provided with an SQLite3 database containing data captured from Defra’s flood monitoring API that was captured every day over two years.
The only constraint to this (aside from following the OpenAPI specification) was that a test suite should pass when pointed to the REST API I have created. This test suite was created by Rob Anderson, who created this challenge.
Given I was allowed to use any technology I wished, I decided to tackle this project using a Firebeetle 2 ESP32-E microcontroller. While I’ve owned this microcontroller for a couple of years with the idea to incorporate it into a future Home Assistant setup, I hesitated due to not having a 3D printer to create protective enclosures for home deployment. This Learn by Doing challenge presented the perfect opportunity to work with the ESP32-E as the requirements of the problem (i.e. networking and database operations) aligned well with my future home automation plans.
This was an incredibly interesting challenge due to the nature of working with a Firebeetle 2 ESP32-E. Although this microcontroller is low-powered and slow compared to your usual host for a REST API, it is also very portable. The scope of the problem was to read river and rainfall levels from a database, yet it could easily be extended to write new flood information to the database. This could be done either from the existing Defra flood monitoring API, or even contribute new data by being deployed to a real river site and record data in real time.
Planning the environment and tooling
Prior to diving into the Flood API implementation, I spent some time setting up my development environment and selecting the correct tools which would enable me to effectively create the Flood API. This section outlines the approach I took, the libraries I researched, and a couple of side tools I built along the way that ended up being quite useful, but not essential.
The development environment
Before I started writing any code, I needed to decide what development environment I should use. The usual go-to option is the Arduino IDE—a beginner-friendly platform primarily designed for Arduino microcontrollers. Whilst it’s great for simple projects, it becomes quite limited when it comes to dependency management or more complex projects.
As an alternative, I opted for PlatformIO which builds on what Arduino IDE can do, but more. PlatformIO IDE tends to come as a plugin for CLion or Visual Studio Code rather than standalone software. Since I am comfortable with the JetBrains suite of products, being able to use CLion was perfect for me. The PlatformIO IDE also comes with tools for dependency management, unit testing via GoogleTest, and remote upload functionality.
Working remotely
Although not essential for microcontroller development itself, PlatformIO’s remote capabilities turned out to be particularly useful for this project. By using PlatformIO Core (their CLI tool), I was able to connect my ESP32-E to a host machine (an old 2012 iMac in my case) and start a remote agent like this:
| |
With the agent running, I could upload builds, monitor output, and even run tests remotely from any other machine using the PlatformIO plugin. This setup was especially helpful since my main development machine is a MacBook Pro. It allowed me to work from anywhere without needing to have the microcontroller physically connected at all times. The main PlatformIO plugin doesn’t actually have options for remote development despite it being available in PlatformIO Core. Fortunately, the Platformio Plus plugin does.

Key considerations
The next step was to think about libraries I would need to use. I had four main considerations:
- How do I expose a web app?
- How can I serialize an object into JSON?
- How can I read an SQLite3 database?
- How can I read a 22mb file on a microcontroller with only 4MB of flash memory?
PlatformIO Home is a local user interface provided by the PlatformIO plugin that helps configure projects. The user interface includes a library search feature, which I used to address my first two considerations.
For exposing HTTP endpoints (consideration #1), I quickly found a few Arduino libraries that provide web server functionality. For JSON serialization (consideration #2), I came across ArduinoJson, which is widely regarded as the standard library for handling JSON on microcontrollers.
Addressing considerations #3 and #4 required more effort. I knew I’d be reading my SQLite3 database from a MicroSD card, so I needed both a compatible MicroSD SPI module and a library capable of reading SQLite databases directly from external storage. After some research, I found esp32_arduino_sqlite3_lib, a library developed by siara-cc. It supports reading SQLite3 databases via various methods, including MicroSD cards via SPI. This library met both of my final requirements. I did find that this library is not found within PlatformIOs library search. However, I could import it into my project via git submodules.
Other useful tools
Although it was not required for this project, I took the opportunity to build a couple of additional tools that proved helpful during development of the Flood API.
First, I wanted to experiment with my LCD1602 module. Getting feedback on the LCD in response to hitting various Flood API endpoints proved to be quite handy. This was especially useful for showcasing important runtime messages such as IP addresses without having to dig through logs. You’ll see it in various portions of my code with command like this:
| |
I also created a cross-platform logger library. Usually, logging on a microcontroller looks like this:
| |
But since I wanted to run tests natively on my MacBook, I knew this default logging approach wouldn’t work outside of the microcontroller environment. So I built a logger that chooses the appropriate logging approach, including log levels depending on the target platform:
| |
With the LOG macro defined like so:
| |
Whilst these tools weren’t part of the core Flood API functionality, they were valuable during development and may be moved into a common library for reuse in future projects. I won’t be covering them in further detail here though.
Implementation
Now that I had my development environment setup, it was time to start the implementation of the Flood API. Within this section, I’ll go through the various steps I took to implement the Flood API. This will include setting up the device and its connections, connecting to the SQLite3 database, and creating a response which will be returned to the client.
Initial setup
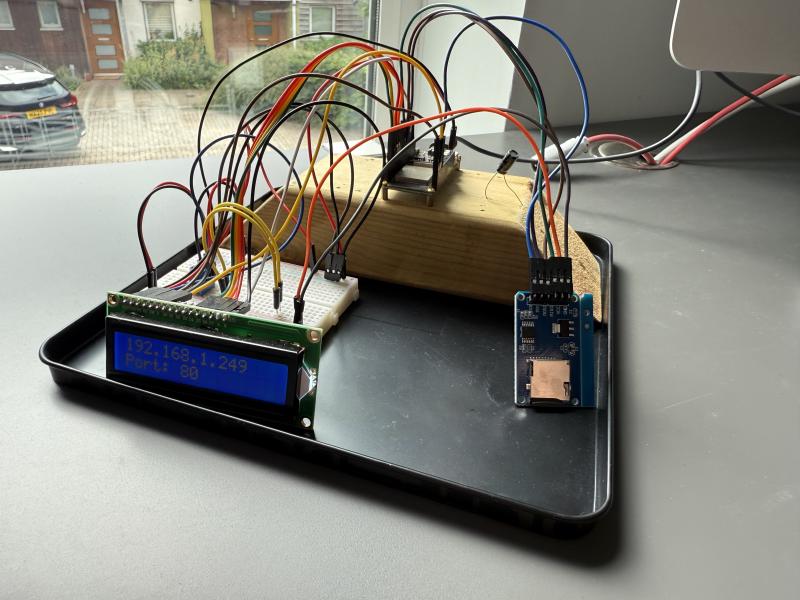
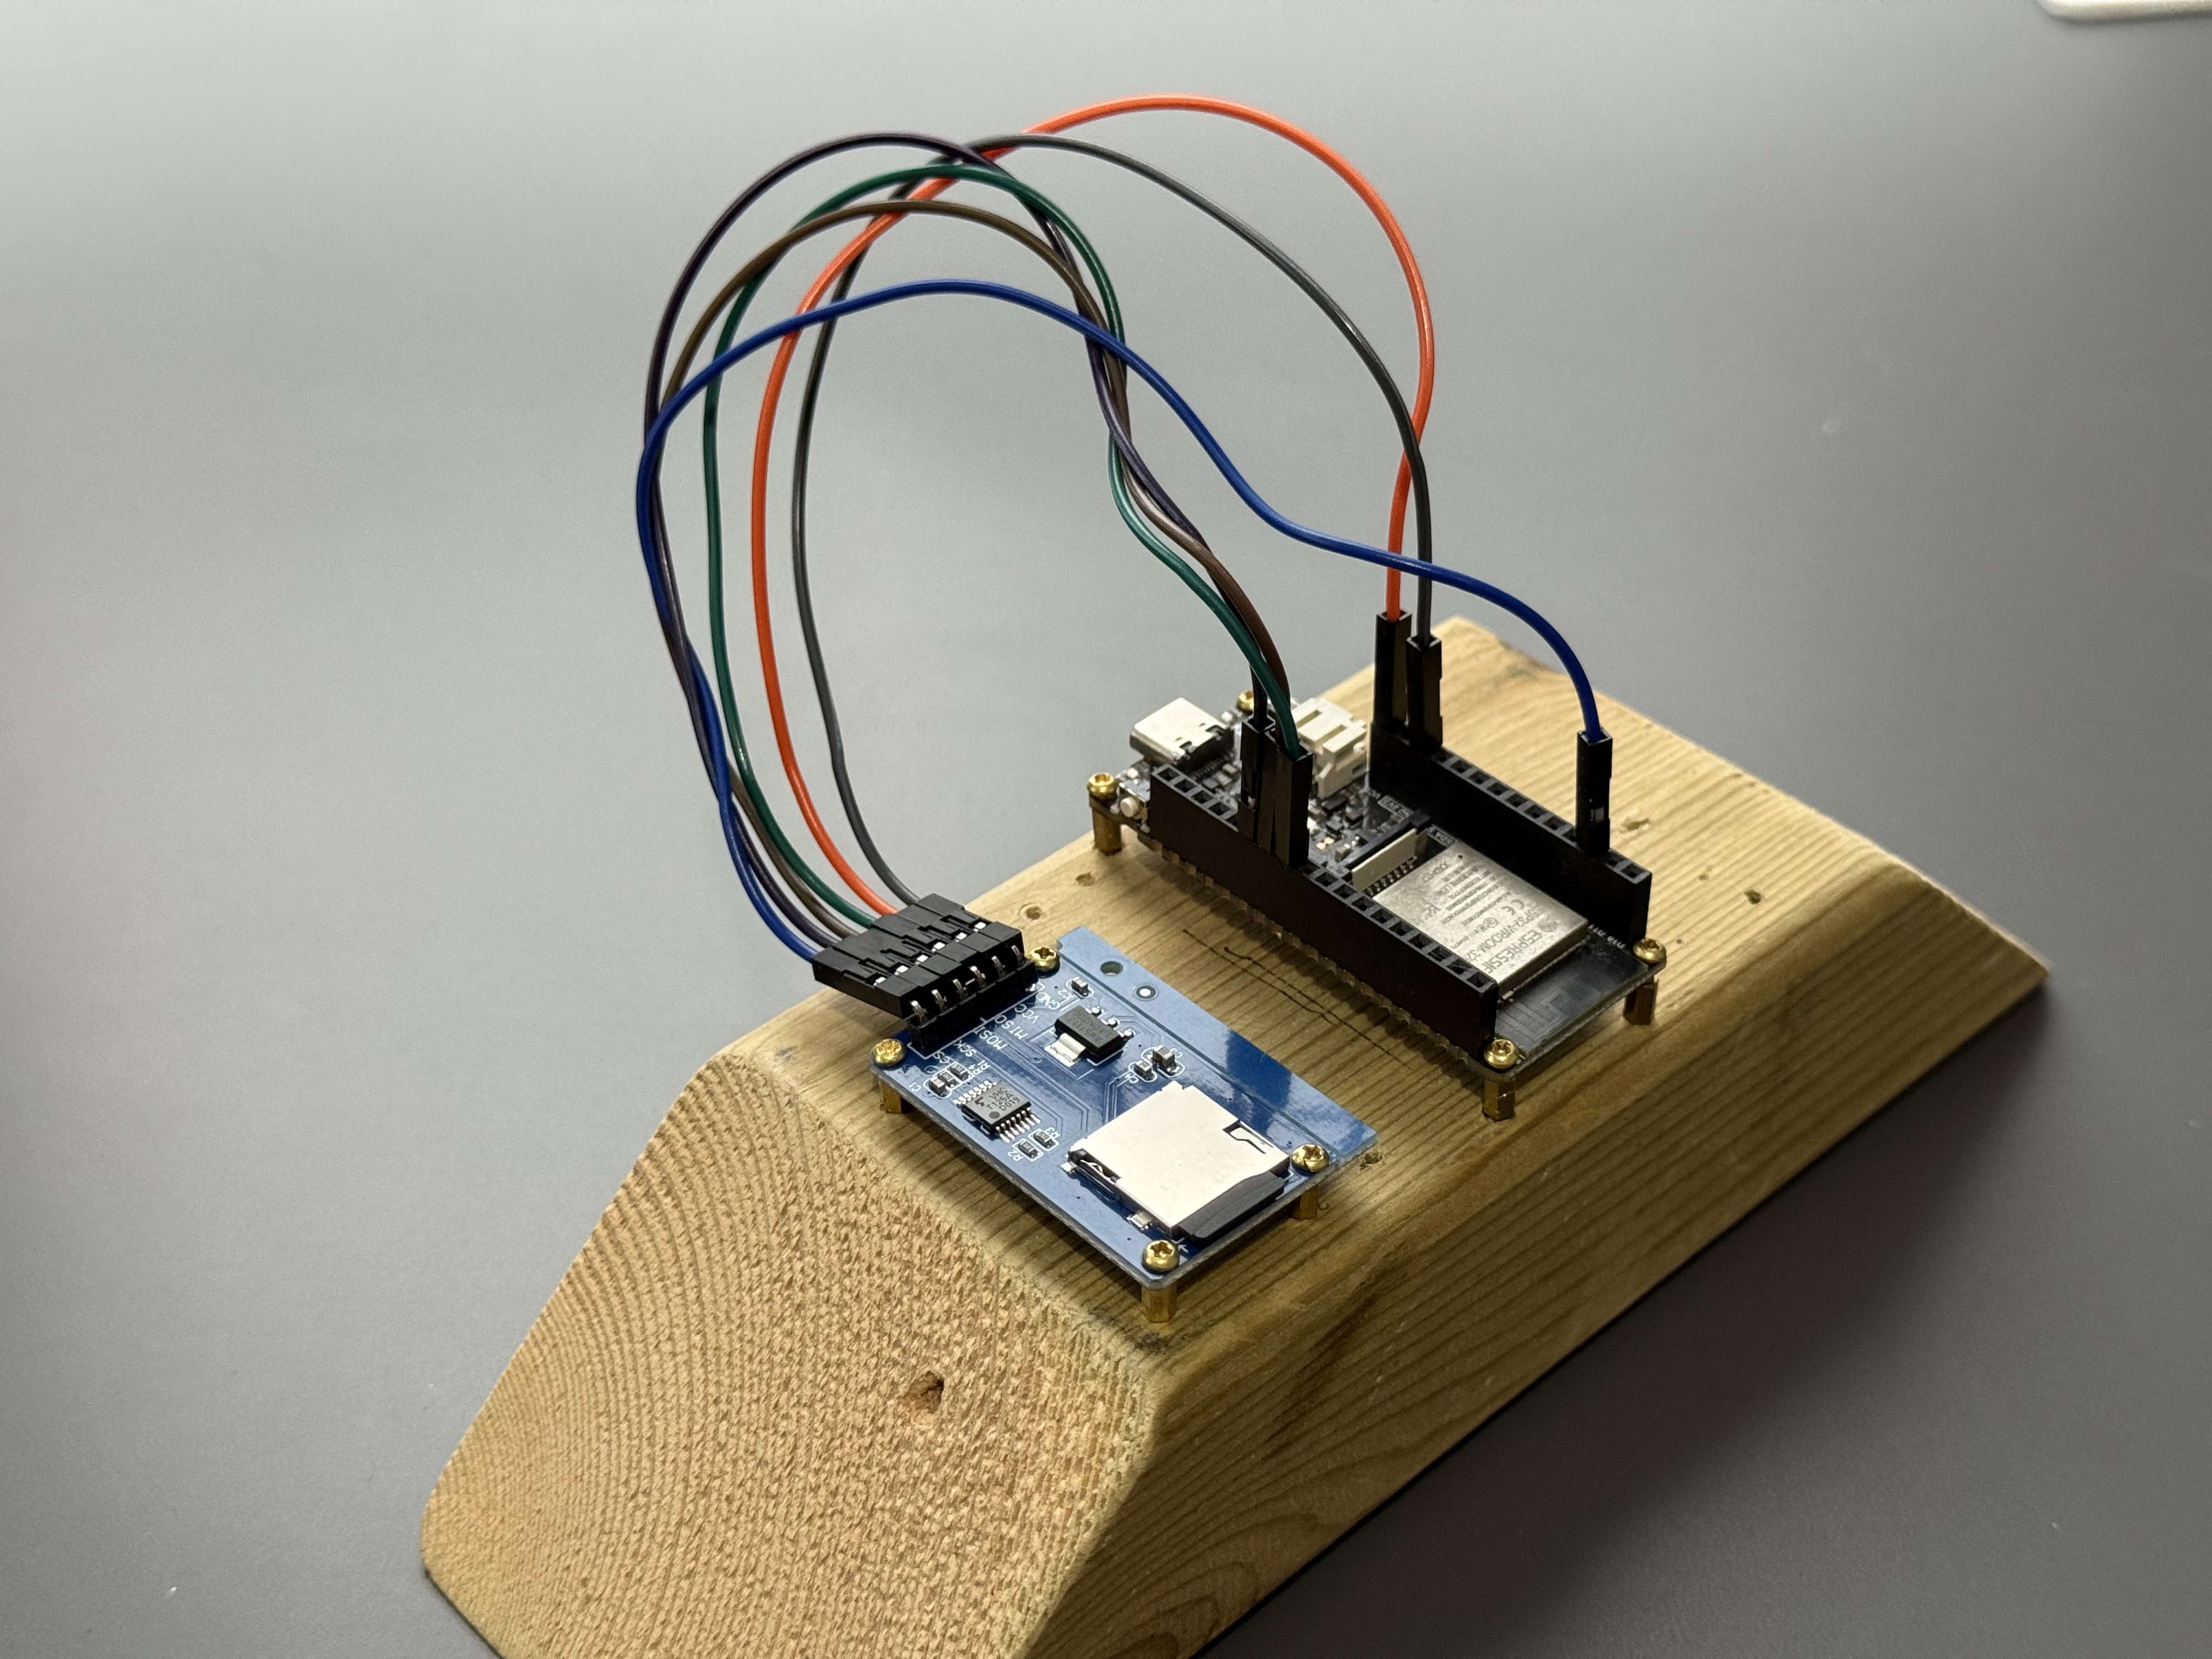
Before touching any code, I needed to setup my ESP32-E microcontroller by connecting the MicroSD SPI module to the correct pins. The pinout for the ESP32-E is can be found on the DFRobot website. The MicroSD SPI module I have contains six pins which all need to be connected to the ESP32-E.
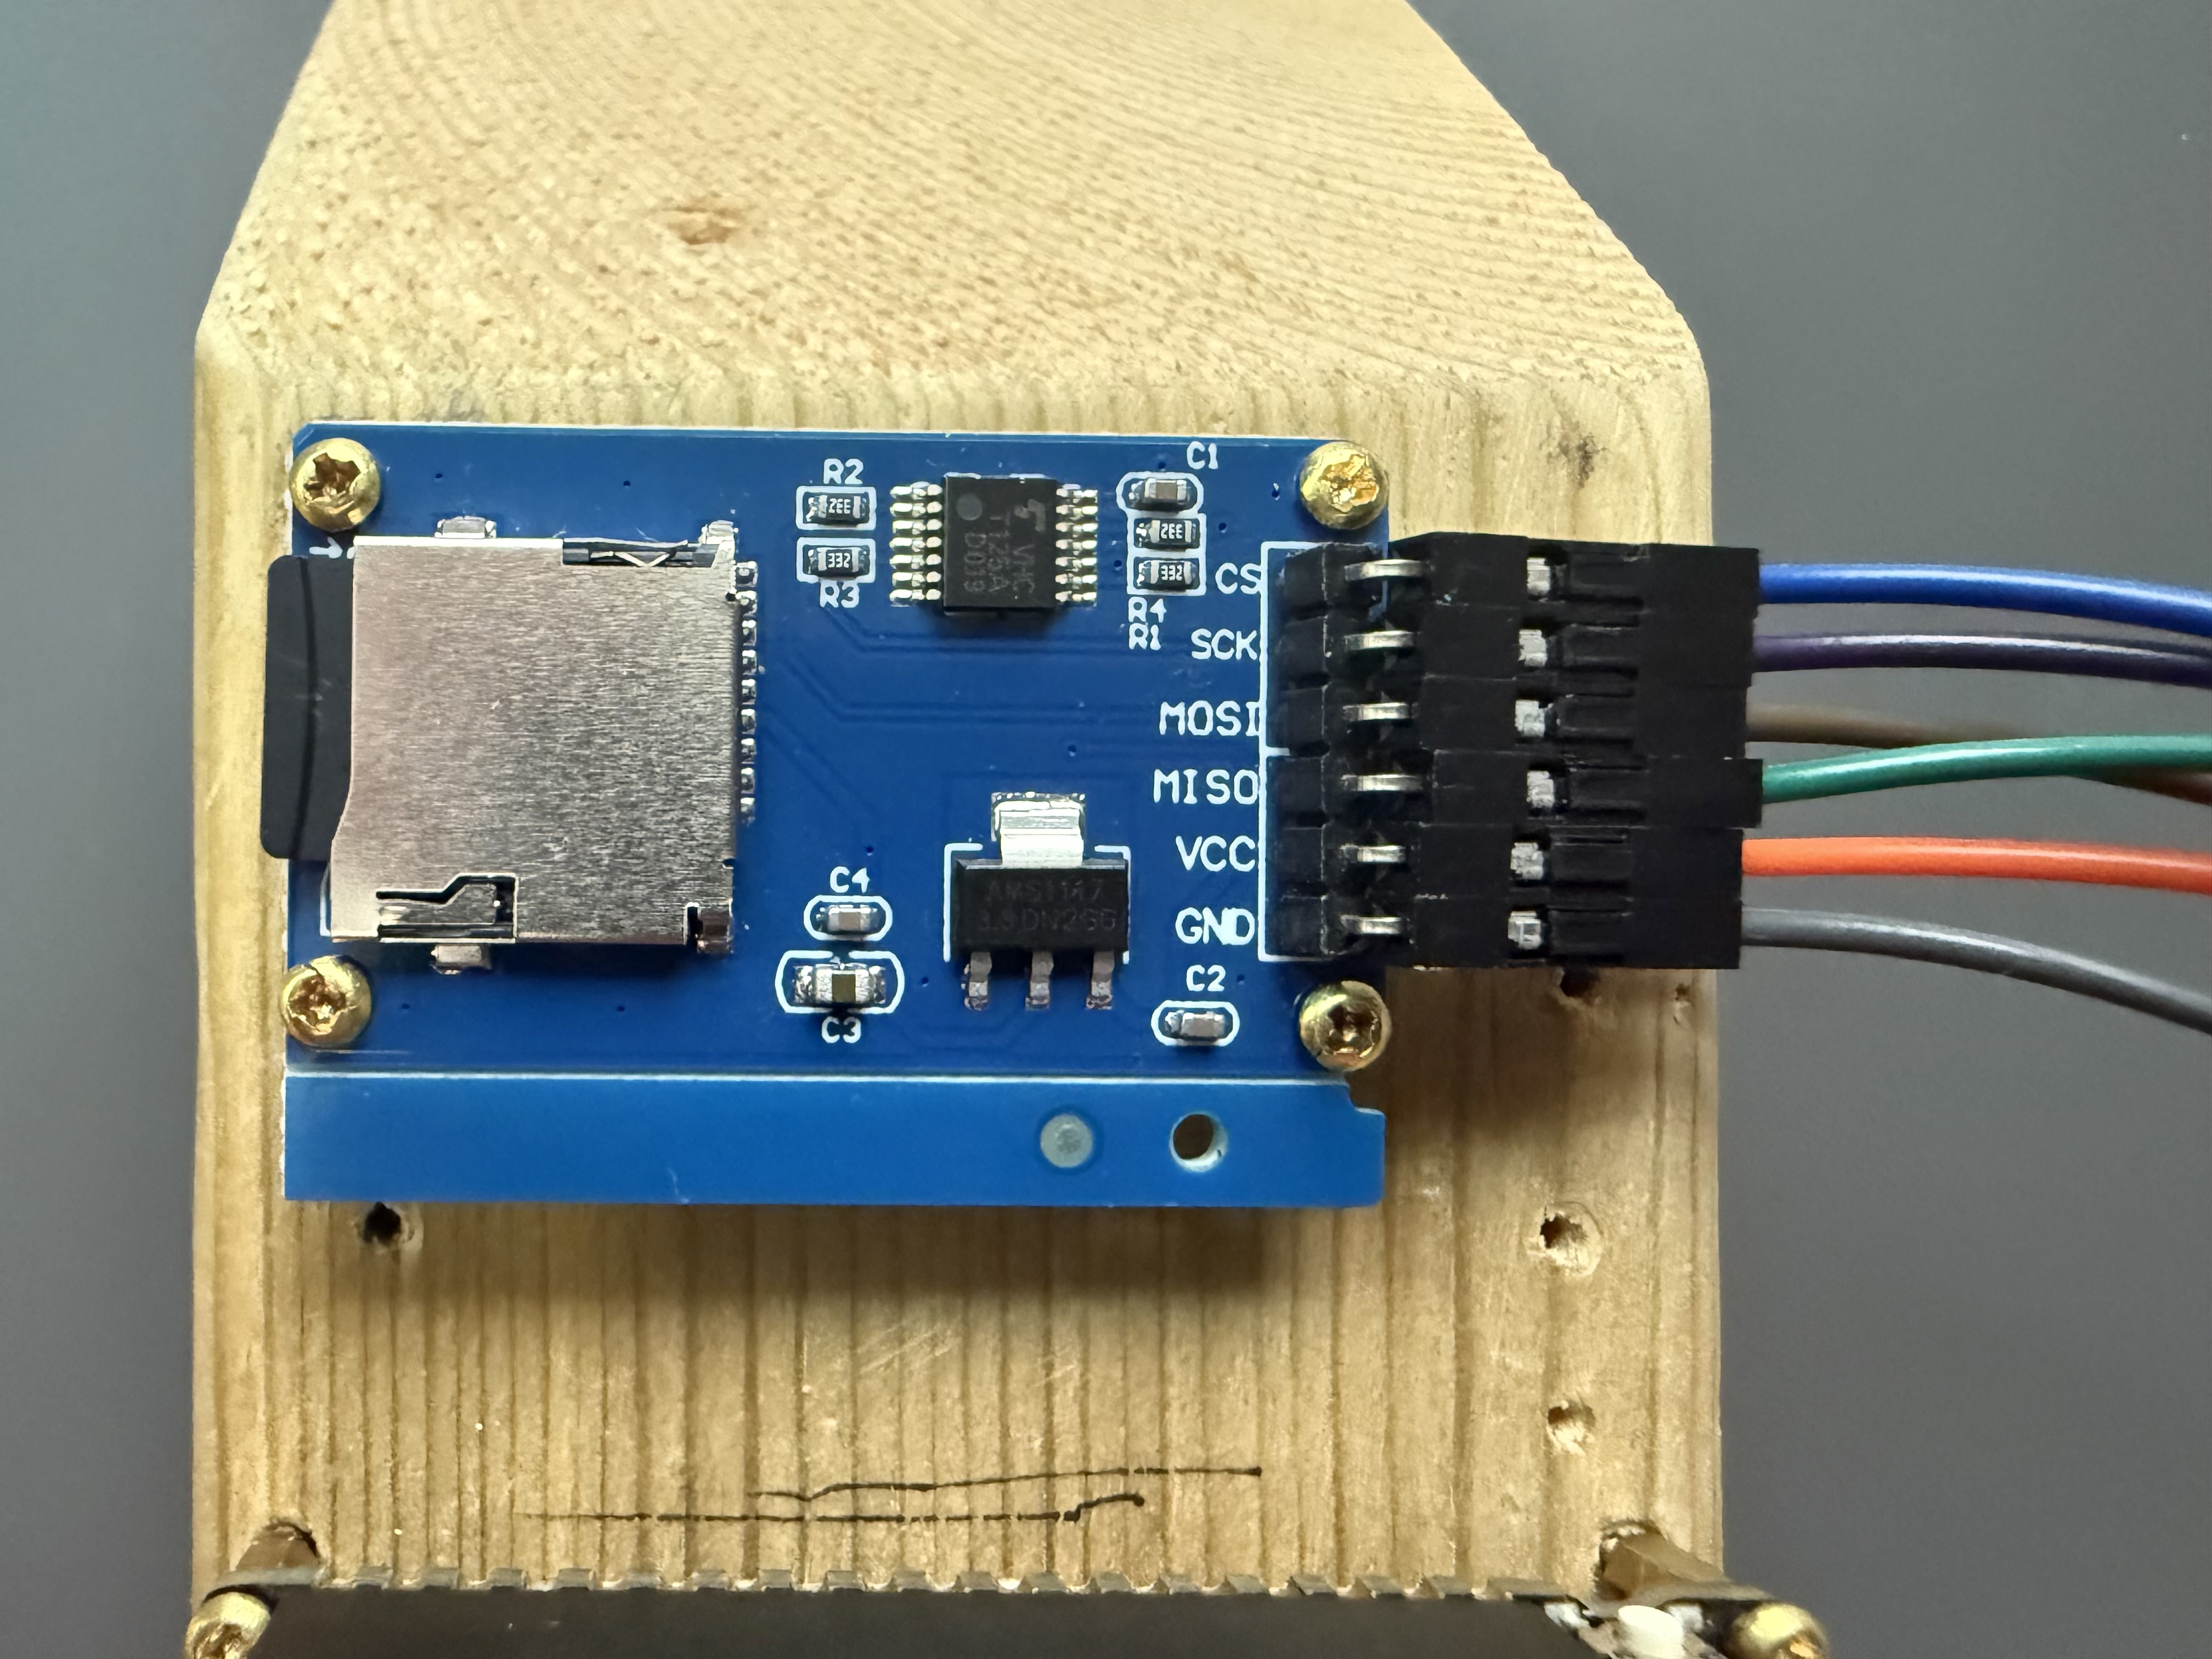
All but one of the pins have a specific pin they should be connected to on the ESP32-E.
| MicroSD Module Pin Name | Description | Connecting ESP32 Pin |
|---|---|---|
| CS | Chip Select | Pin 4 (Used as input or output) |
| SCK | Serial Clock | Standard SPI SCK pin |
| MOSI | Master Out, Slave In | Standard SPI MOSI pin |
| MISO | Master In, Slave Out | Standard SPI MISO pin |
| VCC | 5V Power | Standard VCC pin |
| GND | Ground | Standard GRN pin |
Connecting to my local network
Since the device needs to be accessible from within my home network, I needed to setup my WiFi connection. I used the Arduino WifiClient library to do this. This library provides a simple way to setup WiFi credentials, and then automatically connect to the network:
| |
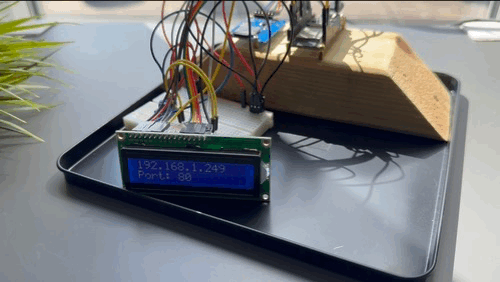
I also displayed the IP address of the ESP32-E on the LCD, and the port number of the API:
| |
Connecting to SQLite3
As previously mentioned, I found a crucial SQLite3 library specifically for ESP32 microcontrollers which supports accessing SQLite3 database files via SD cards. A lot of my implementation here follows a good example which the library provides. Before actually reading the data from the database file, some setup is required.
To begin, I needed to initialize the SPI bus, and SD library. I also make sure that the SD card is readable:
| |
Next, I just make sure that the file I am going to be reading the flood data from is actually readable:
| |
Now that I know the SD card is mounted, and the database file is read, it’s time to initialize the SQLite3 library:
| |
Once the library has been initialized, I open the database file:
| |
Once that is done, the database is actually in a usable state. there is one more thing I do during setup however to better optimize my future calls to the database, and that is cache all station names found within the database to avoid doing additional calls:
| |
Mapping to something useful
Since my API needs to return JSON, I decided to create an intermediary service to map the objects returned by my repository layer into JSON. Using ArduinoJson made this process painless and straightforward:
| |
To convert this JsonDocument into an easy-to-read JSON output, ArduinoJson provides a handy function:
| |
Flood routes
Setting up WebServer
Within the Arduino core libraries for ESP32 is the
WebServer class. This
class is a “dead simple web-server” that supports GET and POST HTTP methods; although limited, it is
perfect and lightweight for my use case of having a read-only API.
The setup for this web server is basic; all you need is to register a handler to a URI:
| |
For handling a URI with a path parameter, UriBraces becomes useful as a matcher, and then the path parameter
can be extracted via the WebServer:
| |
Finally, with WebServer setup, the server can be started:
| |
Returning content on WebServer
With WebServer now initialized, I needed to send a response to the client. As you may have seen in the
Setting up WebServer, as part of handling a URI, I called a function for both /river and
/rainfall/{stationName} which handles the response. Both functions are similar in functionality due to how much
logic is delegated to the repository layer and mappers.
The first step is to get any request parameters passed as part of the request. I created a handy function
which returns the value of a request parameter to help facilitate this. The getQueryParameter
function checks if a request param exists, and extracts it if it does. If the request
param does not exist, then return a default value:
| |
With getQueryParameter(), I could get the request parameters at the start of a request:
| |
Next, data needs to be fetched from the flood repository:
| |
Finally, using my mapper, I could turn this data into JSON and return a response using WebServer:
| |
The function for getting rainfalls for a station is very similar, only it has the addition of the path parameter
from the URI /rainfall/{stationName}, and a quick check to ensure that the station passed exists:
| |
What setbacks did I have
As this was my first embedded project, the implementation wasn’t entirely straightforward. A couple of things set myself back and made me reconsider approaches at times. Whilst these issues didn’t stop the project from completing, it definitely would shape how I design future projects on the ESP32 series of microcontrollers.
Partition tables
The next issue I had with the Flood API was storage. My Firebeetle 2 ESP32-E only contains 4MB of flash memory. This does not mean I have 4MB to play with.
This default partition table ends allowing slightly more than 1MB of storage for your main app. Turns out for the Flood API and the number of dependencies I was using, I needed slightly more than the default:
| |
To fix this, you can define your own partition table if you know what you’re doing, however there are quite a few default partition tables you can select from which probably fit all possible needs.:
| |
The default partition table is split into six partitions:
| Partition Name | Type | Size | Purpose |
|---|---|---|---|
nvs | data | 20KB | Non-volatile storage. Usually holds Wi-Fi credentials, or user settings. |
otadata | data | 8KB | Stores over-the-air update metadata. |
app0 | app | 1.25MB | First firmware slot. Contains the application the user has created (Flood API). |
app1 | app | 1.25MB | Second firmware slot. Used when updating. |
spiffs | Data | 1.375MB | File system storage, used for storing assets like logs or data. |
coredump | Data | 64KB | Reserved for crash dump data. |
The key thing here is that there is support for over-the-air updates. Whilst useful, for this project it’s
unnecessary and I could take that storage for my own use. I also didn’t need all the space on spiffs partition
as my SQLite3 database would be stored on a MicroSD card anyway. I went for huge_app.csv as it fit all of my needs:
| Partition Name | Type | Size | Purpose |
|---|---|---|---|
nvs | data | 20KB | Non-volatile storage. Usually holds Wi-Fi credentials, or user settings. |
otadata | data | 8KB | Stores over-the-air update metadata. Not used due to lack of second app partition. |
app0 | app | 3MB | The only firmware slot. Contains the application the user has created (Flood API). |
spiffs | Data | 896KB | File system storage, used for storing assets like logs or data. |
coredump | Data | 64KB | Reserved for crash dump data. |
This partition table was then added to my .platformio:
| |
If I needed even more space for the application, I could have created a custom partition table file and removed
otadata and
spiffs entirely. However, the defaults provided in huge_app.csv were more than sufficient for the projects needs.
This then allows the Flood API to fit on the ESP32-E with plenty of room. Although this meant that I couldn’t update the app remotely in a deployed setting, for this project it wasn’t in scope. This does, however, highlight a crucial drawback to this specific microcontroller when it comes to memory.
SQLite3 compatibility issues
When I first set up the repository layer, I ran into an issue with reading the SQLite3 database file. Initially, I suspected it was my own error, but testing with an example database from the SQLite3 library showed that the issue was specific to the flood database file I was using.
I knew the file itself was fine - others working on the same challenge were using it without issues - so my next
suspicion was a compatibility problem with the library. Checking the database version confirmed the file was built with
SQLite 3.43.2:
| |
The library I used was also based on this version, so I expected it to work. However my application logs showed that this was not the case:
| |
Locally, flood.db opened without issue. So I decided to recreate it myself. First, I dumped the database:
| |
I then downloaded SQLite 3.43.2, and built it from source:
| |
Finally, I created a new database from the dump:
| |
Using this newly created version of the flood database resolved the problem:
| |
I’m still not so sure as to why the original file failed with this library, but recreating it allowed me to move forward.
Whilst I did manage to get this working in the end, I did spend a large amount of time exploring other database options. This was mainly due to both space constraints, which I explained in the Partition tables section. At the time, I did not think I could modify partition tables, so I instead tried to find something more lightweight.
Whilst debugging the storage issues I was having, I briefly explored connecting to an external MySQL database. The idea was that offloading the search functionality to an external server would mean that the library I’d use for connecting to the database would be more lightweight. I did manage to get this working, however, it still didn’t fix the underlying storage limitations. In retrospect, if I had fixed the partition tables before trying this, it would’ve worked completely fine as my tests confirmed. Although this idea was scrapped, it’s handy to know it’s possible to use an external MySQL database in a REST API on a microcontroller.
The final implementation
After a lot of work, the final Flood API was complete. With the ESP32-E started, I could connect to the API which I had implemented.
With my ESP32-E powered on, I could make a request to the /river endpoint with three parameters:
| |
And I could make a request to the /rainfall/{stationName} endpoint with a parth variable, and two request parameters:
| |
To ensure the API worked as expected, I ran the provided test suite, which I could call to know if what I’ve done was working:
| |
On first inspection the test suite works as expected, however, I did notice that some tests were failing. After some investigation, I found that they were failing due to performance issues and the test suite was timing out. With this in mind, I decided to ignore those failing tests and call it a success. This timeout is only due to multiple requests being made at once, and the ESP32-E is not powerful enough to handle them. I also verified this by hitting the endpoint manually.
What I learned
The purpose of the Learn by Doing initiative is to undertake a project in a language or technology that would challenge you. This is a great way to learn a new skill or technique, and this project was no exception. I gained a lot of experience working with the ESP32-E, understanding what it can do, and how to use it effectively. The main goal of using this microcontroller was to explore how it could be used in a home automation context, and I’m happy to know that it could be used in this way.
The first and biggest thing I learned was how many libraries exist on the PlatformIO library registry, and without a couple of libraries supporting the ESP32-E, I would’ve struggled to get this project working. I wanted to give mention to the following libraries which helped me get this project working:
The next takeaway was the understanding of using external storage. I knew that the flash memory of an ESP32-E was limited and always will be. Knowing that I could use an external storage device, such as a MicroSD card, allowed me to explore how I could use this to store data. In this project I used it to store the SQLite3 database and could easily write to that database as well if I were to record data instead.
The last thing I learnt was just how straightforward it is to set up a REST API on an ESP32-E. Using the
ESP32 WebServer library-as seen within
the flood routes section-I was able to quickly build an API which could be used to
retrieve data from the SQLite3 database. While most of my use cases for the ESP32-E revolve around home automation,
adding WebServer to my devices would make it easy to query their status and gather additional information.
What I’d do differently
The biggest thing I would do differently if I were to do this project again is to use a different microcontroller. The Firebeetle 2 ESP32-E is a great microcontroller, yet the version I own has storage limitations which make it unsuitable for this kind of application; although I was able to fit the application on the microcontroller, I had to disable any over-the-air update functionality to do so, making it impossible to update the application remotely. There are other models of this same microcontroller with more flash memory, specifically a 16MB variant, which would allow me to hold the entire application without compromise.
If I wasn’t limiting myself to what database solution I should use, I would’ve perhaps went with a MySQL database. Realistically, if I were setting up a home automation system, I’d like all the devices to be connected and storing data in the same database to keep all the data in one place. It would also mean that not every device I own would need to have a MicroSD card, making it more cost-effective.
Wrap up
I would like to thank to Rob Anderson for creating July’s Learn by doing challenge, it was incredibly interesting! This project was a great way to understand embedded systems, and I’m looking forward to exploring more of the capabilities of the Firebeetle 2 ESP32-E in the future.
